In Handling conflicts when making a Pull Request (PR), I covered how to resolve a conflict using just git from the command line in a terminal.
This article will focus on how to use a Graphical User Interface (GUI) called SmartGit to handle the conflicts in a PR.
Creating a Pull Request
When you are done editing your translation in tC Create, you have merge your branch into the master branch so the main source is updated ad others see your changes.
Step 1: Go to home page of your branch on DCS from tC Create
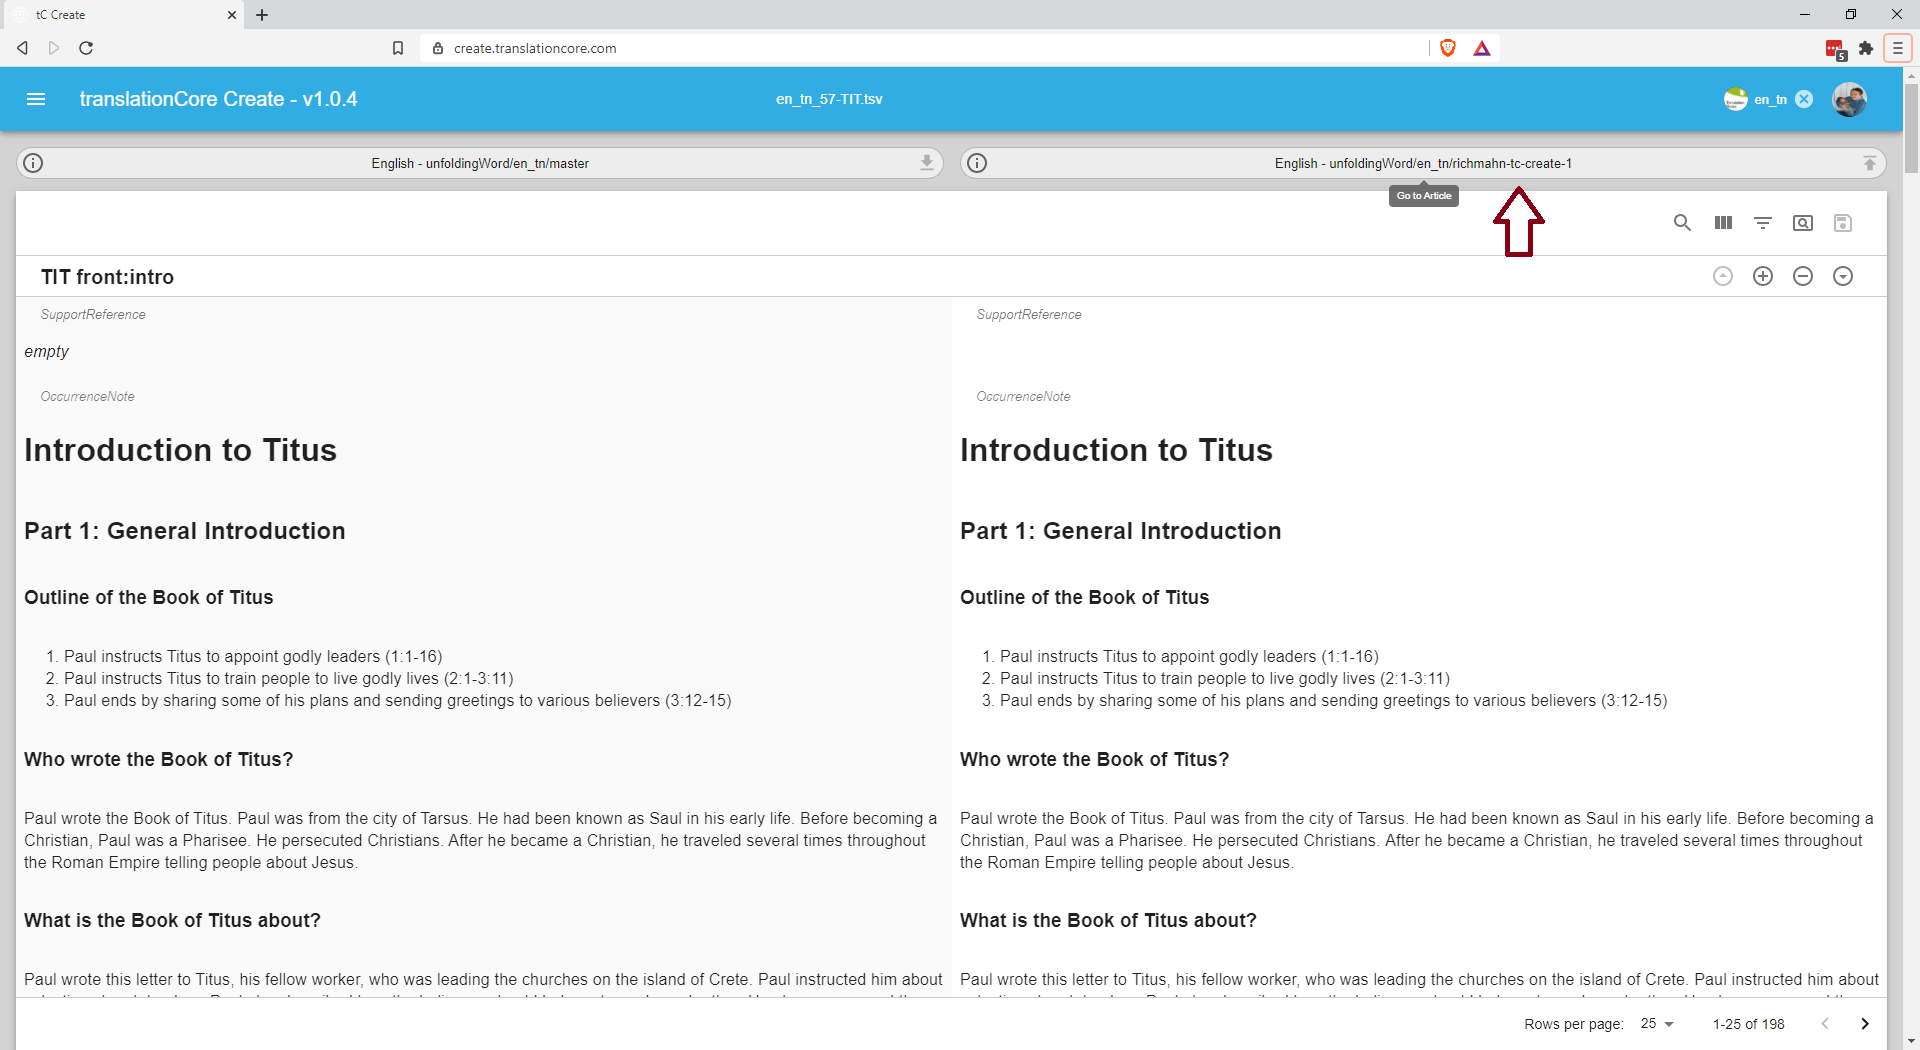
You do this by going to your repository by clicking the link in tC Create at the top of the right column where you make your edits in tC Create:
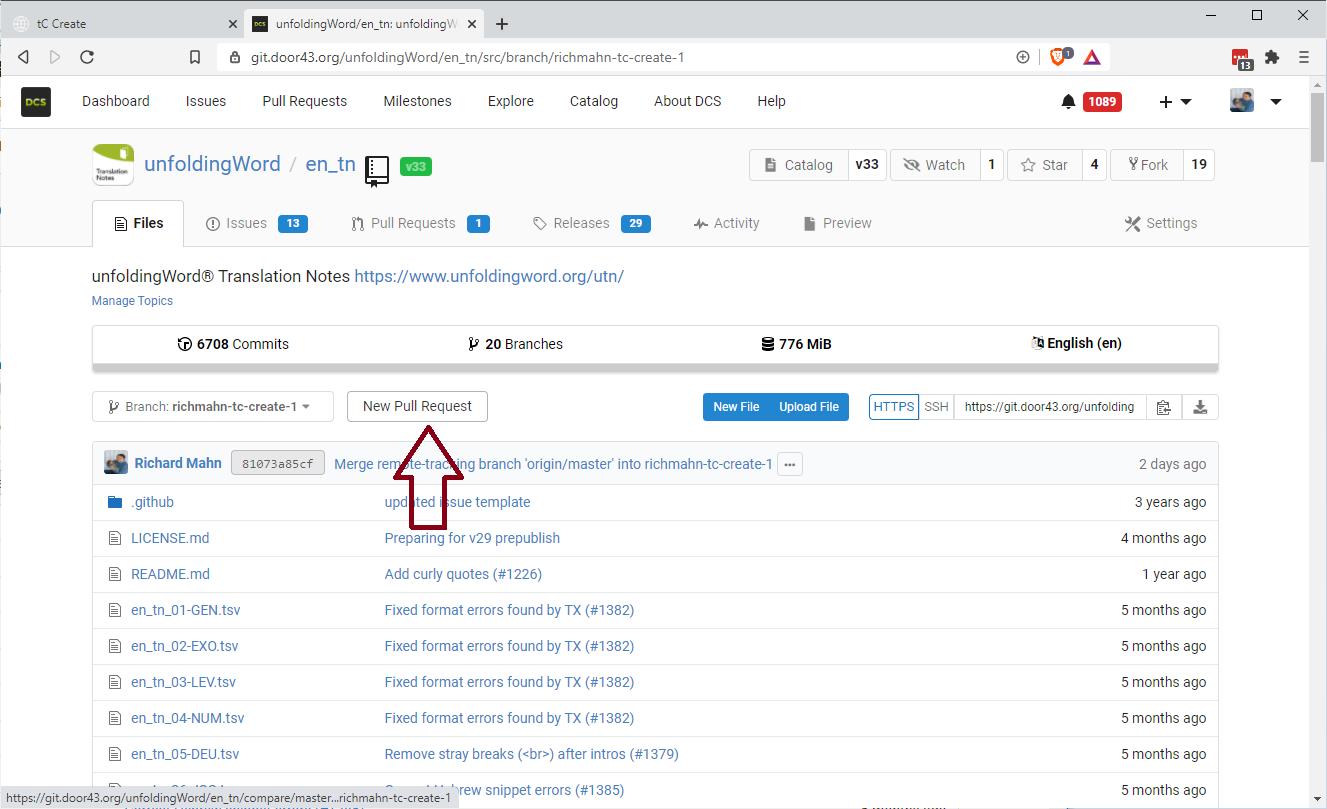
This will get you to DCS and will be showing the particular file you were editing. We can’t make a PR for a single file though, so you will want to click the repository name in the breadcrumbs next to your branch name (see image where to click, in this example for en_tn):
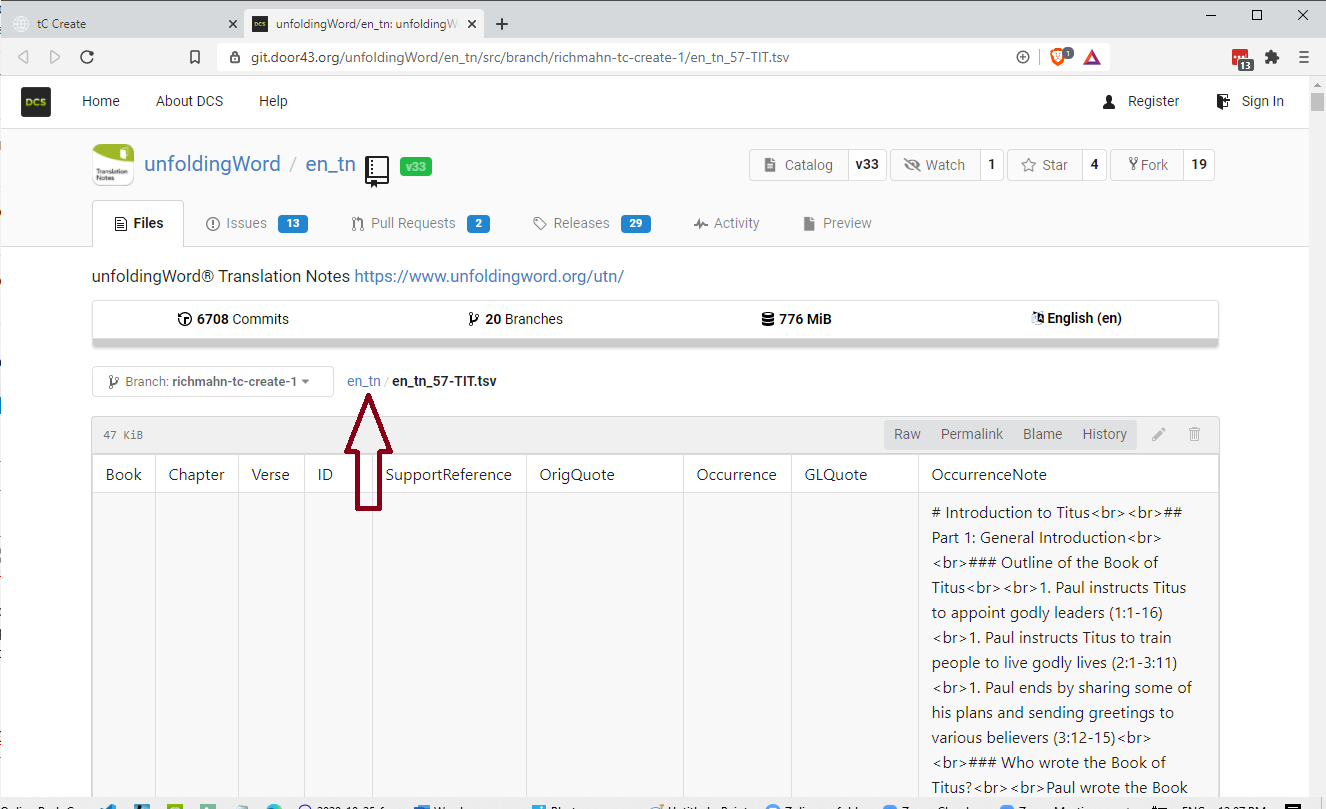
This is the home page of the repo for your branch.
If you see a “New Pull Request” button on this page where you clicked on the previous page, that means you are already signed into DCS. Skip to step ############################.
If in the place where you just clicked is now a “Compare” button instead of a “New Pull Request” button, but you are already signed into DCS (You do NOT see “Sign In” at the top right and instead see your avatar), that means a pull request has already been started for your branch. Click the “Pull Requests” tab at the top of this page and skip to step ############################.
Step 2. Sign In to DCS
If your screen looks like the following, sign in by clicking the “Sign In” link at the top right:

Sign in using the same credentials that you used in tC Create to sign in:

Once signed in, you should be redirect to your branch’s home page again and now should see a “Pull Requests” button next to your branch name. (If you still see a “Compare” button, that means a pull request has already been made for your branch. Click the “Pulls Requests” tab at the top of this page and then click on the PR for your branch and skip to step ################################.)
Step 3. Start a New Pull Request
Now that you are signed into DCS, click on the “New Pull Request” button:
You will now be on the compare page which will show you a “diff” (differential) of your changes. Please make sure that the left drop down with the label “merge into:” is set to the proper owner, as your repository could be a fork of another language’s repository. Select the proper “master” branch if it is not correct:
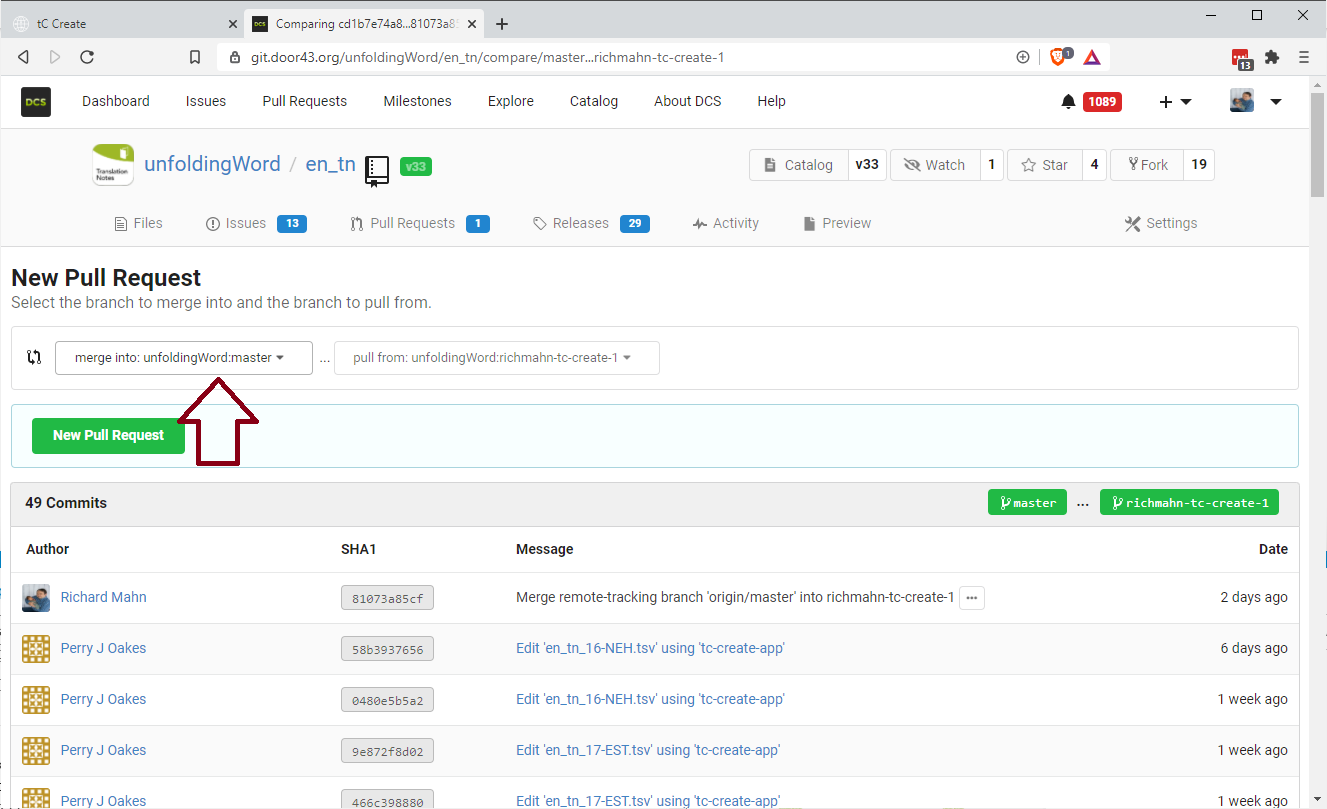
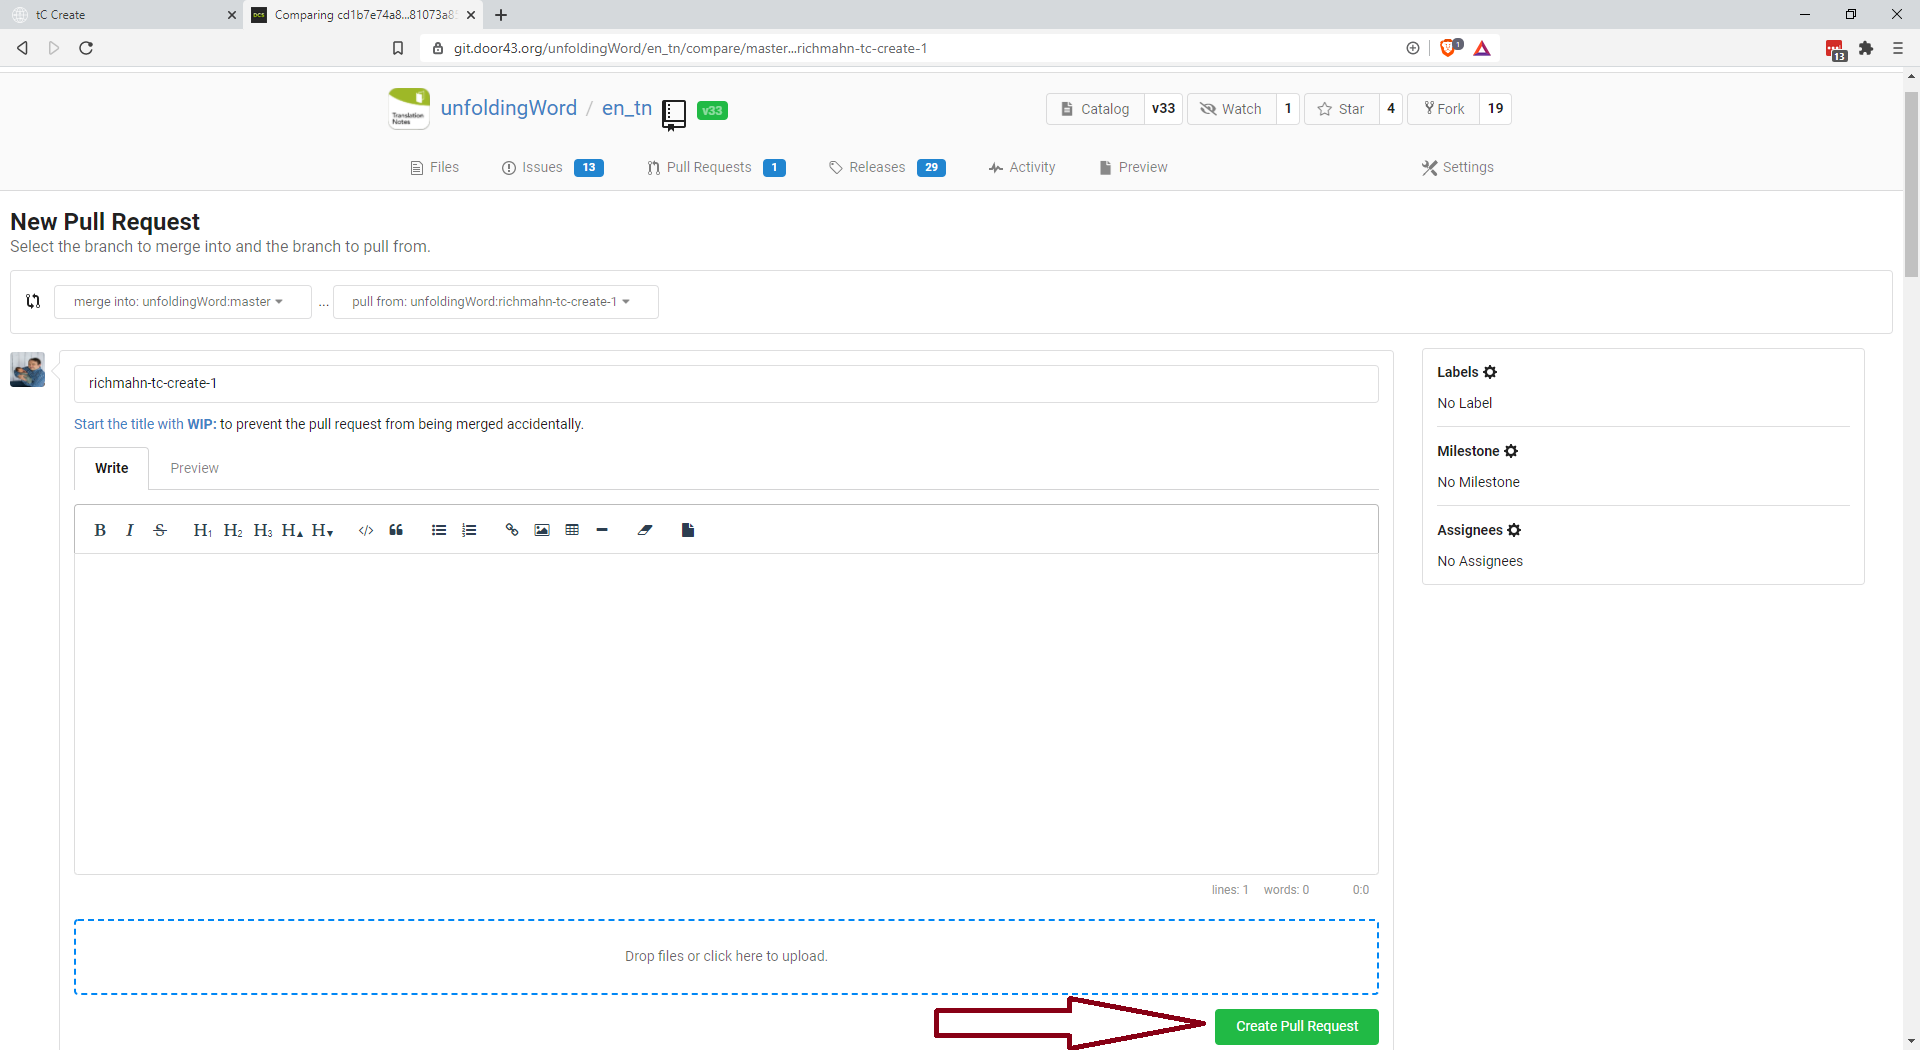
If all looks correct, click the green “New Pull Request” to go to the form to set up your PR:

You can title your PR if you want, or leave it as just your branch name (e.g. richmahn-tc-create-1 in this example). You can also fill in the description of the PR in the field with the “Write” tab if you’d like to describe the edits you made, but this is optional. Click the “Create Pull Request” button when you are done: