July 31, 2018 1:55 PM
STAGE 1. Work Involving Software Team
-
The English source text can be downloaded from the door43 website, Door43 Resource Catalog - Door43 Content Service. The catalogue organization and various projects can be browsed here.
-
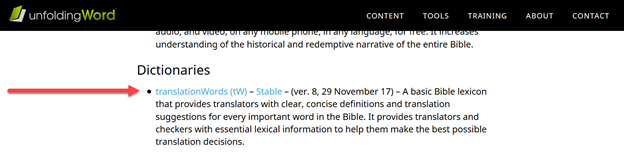
The best way to find the specific English repository is by the links from the uW (unfoldingWord) website, Content - unfoldingWord. Scroll down to Dictionaries and click on the link translationWords (tW) -Stable
-
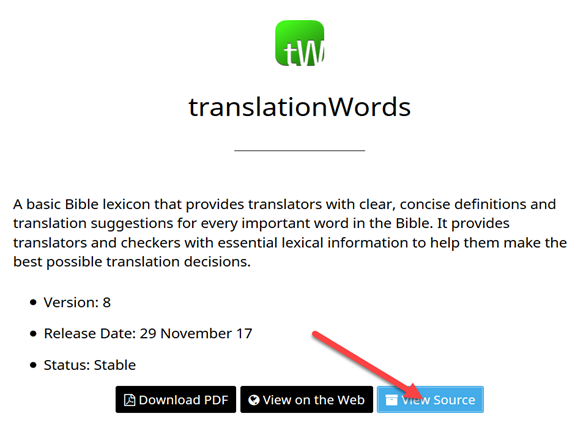
Now click on view source as seen in the image below
-
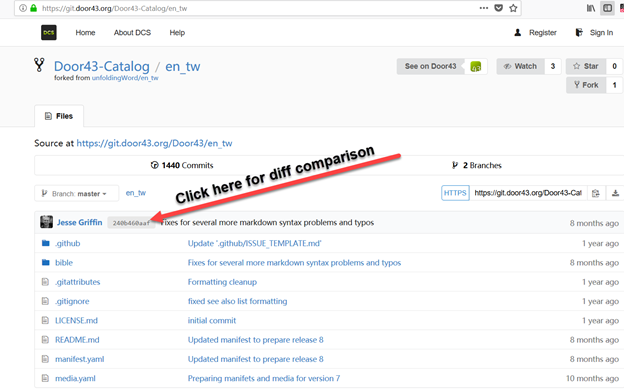
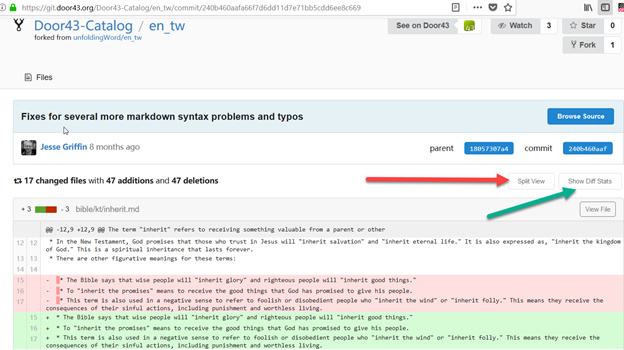
This will direct to Door43 catalog page for English translation Word resource. To do a diff Comparison of the versions click on the link as shown in the following image.
-
Click on Split View to see split screen of the diff comparison the same window and click on the Show Diff Stats (follow green arrow) to see the diff under each word.md file.
-
In certain cases, like tN it is always better to start using the latest release from the unfoldingWord organization Releases - en_tn - Door43 Content Service .
-
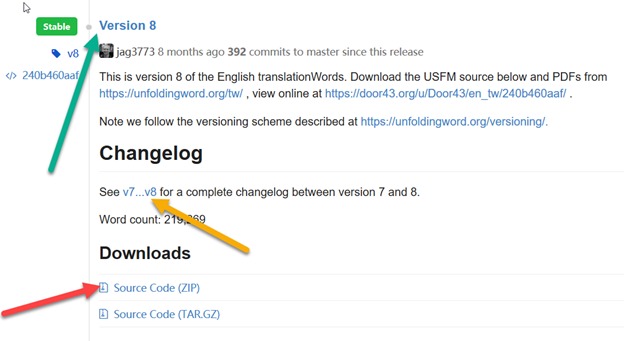
As an e.g., tW source text in English can be downloaded form this link Releases - en_tw - Door43 Content Service . Click on Source Code (ZIP) to download the resource (red arrow). Always make sure that you are downloading the latest version (follow green arrow). To do a diff comparison click the link under changelog (orange arrow)
-
To view the diff comparison, follow step 4 & 5.
-
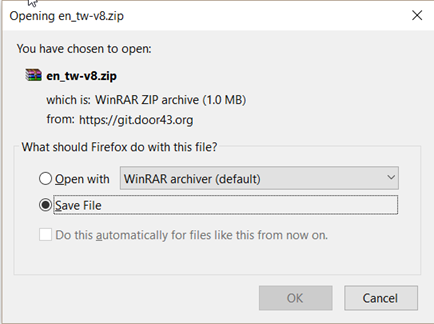
Click on the link “Source Code (ZIP) for windows users. TAR.GZ if for Mac users” as shown in the image above (red arrow) to download the resource.
-
A zip file
 will be downloaded to Downloads folder by default i.e.to My Documents Downloads, unless saved to other location manually. This is applicable for users using
  version 7 and up.
 -
The downloaded file has a lot of links and information that need not be translated. Each resource has a Python script that is run to remove links. For tW “removelinks.py” is used to remove links and other information that need not be translated.
-
After the links are removed the file is ready to be pushed into memoQ as a bi-lingual document, ready to be translated by the translation team.
-
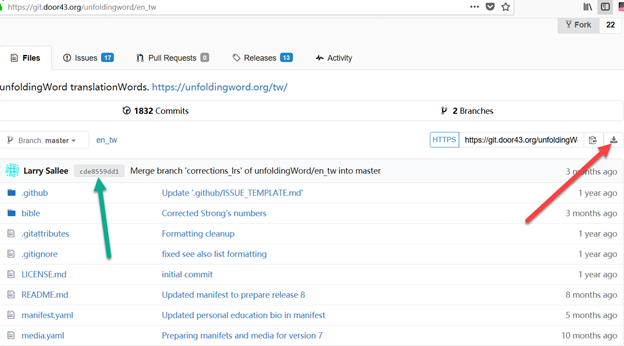
NOTE: To download the latest repository that includes all the current updates follow this link unfoldingWord/en_tw: unfoldingWord® Translation Words - en_tw - Door43 Content Service . To download the resource, click on the download link as shown in the image below (red arrow) and follow steps 9 &10. To view diff comparison, follow steps 4 & 5. All the previous versions of the resources used for translation should always be compared with the latest ones and the changes needs to be incorporated by checking with the diff comparison.
STAGE 2 Using memoQ for Translation
-
Open memoQ
-
On the top left corner click on memoQ tab next to project tab
-
Click on the New Project under My memoQ tab to create local or online project
-
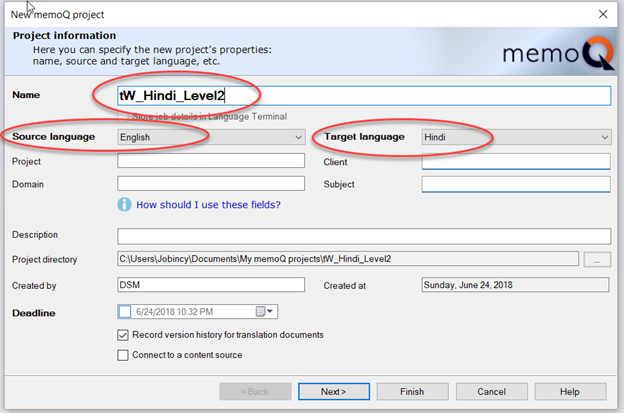
Click on ‘New Project’ as shown in the image below
-
Give a name for the project and set the target language as shown in image above
-
Click ‘Next>’ to go into the next window
-
You can import the “Source Text” by clicking the import option or the source text can be imported at a later stage. As in this case click Finish to complete setting up the new project.
-
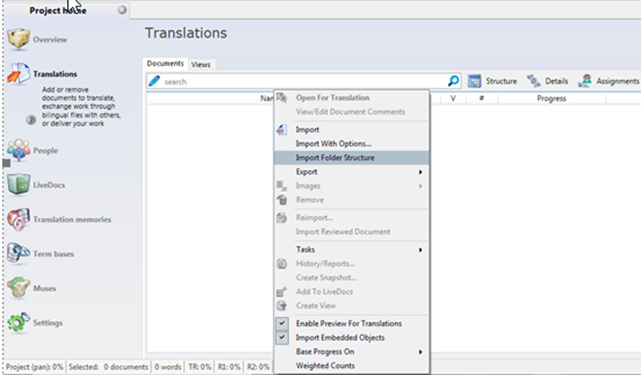
Click on Translations under the overview as shown in image below.
-
Right click on the blank space as shown in image below click on ‘Import Folder Structure’. You can click on any of the options i.e. ‘Import’ or ‘Import With Options’. In this case we will go with the Import Folder Structure to import the files in one go.
-
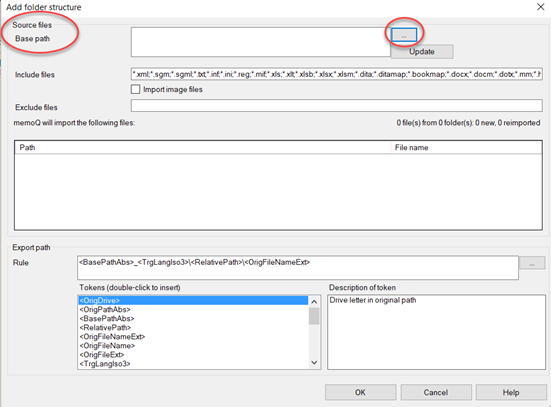
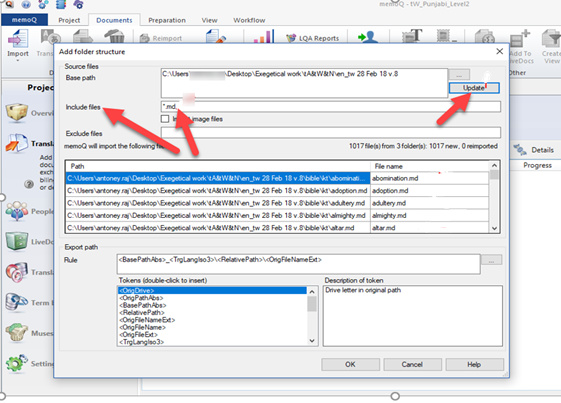
Click on three dots … as shown in the image below to select Source files in Base Path.
-
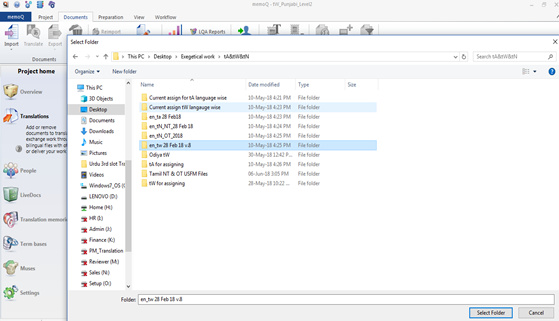
Select the folder where you have the source files saved. As in this case the files are saved on Desktop Exegetical WorktA&tW&tNen_tW 28 Feb 18 v.8. Select the folder for the file to be uploaded to memoQ
-
After selecting the folder, the next step is to click update and then define the files extension i.e. “.md” next to ‘Include Files’ Textbox as mentioned in the image below.
-
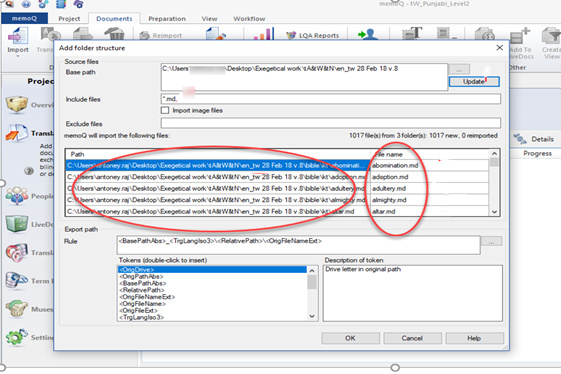
Check if the files have been imported as .md extension as mentioned in the image below and click OK.
-
On the next screen towards the left we see tW with .md extension having an exclamation mark in red
 and under the Filter segment you will see “Unknown filter”
 -
Click the Filter and a dropdown menu will pop up. Select “Plain Text Filter” from the list for .md format files
-
Once the “Plain Text Filter” is selected the red exclamation mark
turns into green  check mark and under the filter tab the “Unknown Filter” changes to “Plain Text Filter”. Click OK to continue
 -
Now you see the status bar progressing as it is getting the source files imported. Wait for this process to complete. It may take some time.
-
Once the source files are imported the tW files can be displayed in .md (Markdown) format.
-
Double click each word.md file to see the source translation. These files can be exported and
assigned to translators for translation. The assigned file should be in RTF (Bilingual format). Clear orientation should be given not to edit or delete any file code or source text, by the translators. Translation must be done on the target without any source text being touched. -
In case of direct translation in MemoQ, you may exclude the procedure for “LiveDocs”. However if work assigned to translators is in bilingual format then LiveDocs needs to be created and the relevant translated files should be imported.
-
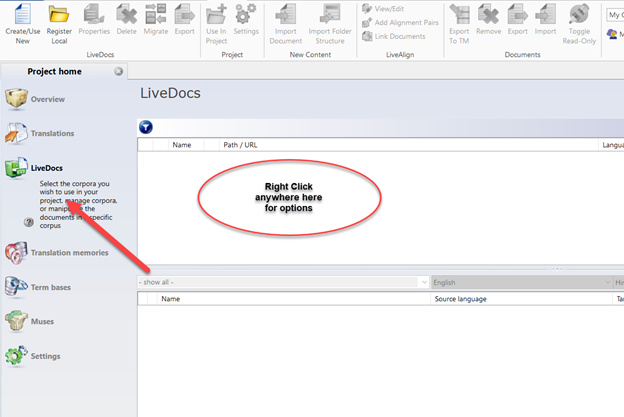
Click on LiveDocs as seen in image below. Right click for options to create a new LiveDocs.
-
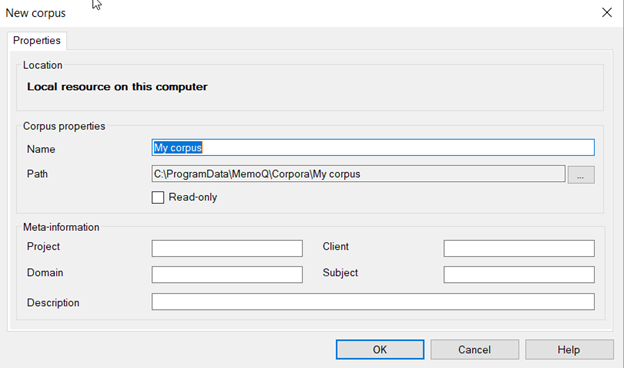
Fill the information for Corpus properties. Give a name for the Corpus. And click OK.
-
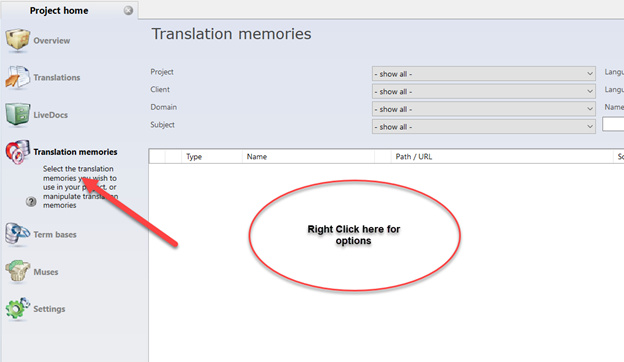
Once the LiveDocs is created the next step is to create the Translation memories. Click on “Translation memories” and right click in the area as shown in the image below. Click on the Create/Use New option
-
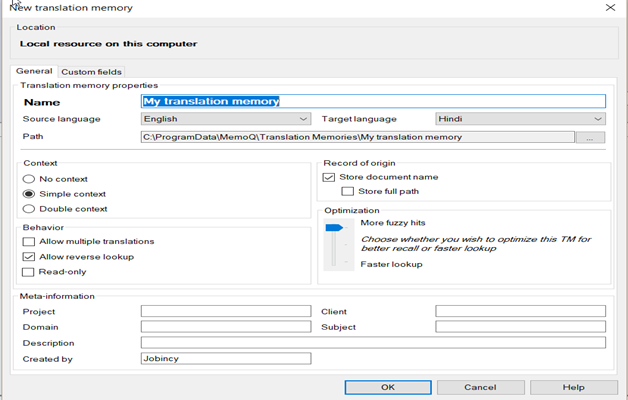
Give a name for the New Translation memory and click OK.
-
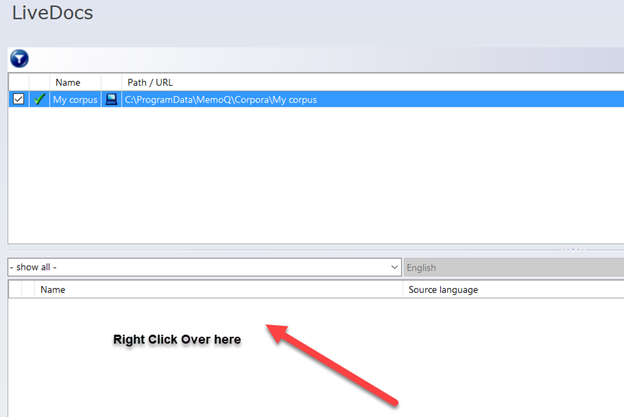
Click on LiveDocs after creating the Translation memory and right click on the space as seen in the image below to show options, click on Import Document or Import Folder Structure to import translated files.

-
You can select all the files together or select it one by one after clicking the Import Document option and then click “Open” button
-
The extension will show as .rtf in the next window as the file exported is in RTF format for the translators to translate. After the translation is completed you need to import the file back in RTF format and then click OK.
-
Under the - show all – you will see the file. Open the file by double clicking
-
The next window will open in memoQ bi-lingual format.
-
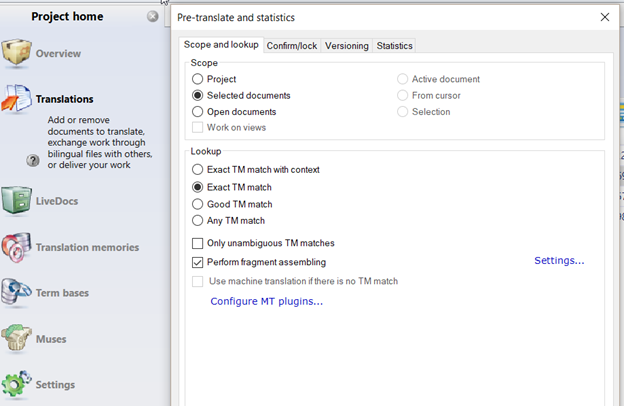
Click on Project home and click on the file that you want to work on and right click on the file and click on TasksPre-Translate as shown in image below.
-
A Pre-translate Statistics windows opens. Under lookup make sure that the radio button is selected for “Exact match” as shown below and then click OK.
-
Double click on the file that you pre-translated to see the content. To select the entire source and Target Press Ctrl+Shift+A.
-
After the screen is selected press Ctrl+Enter Key together. Now all the segments turn green in color. Click on Project home tab.
-
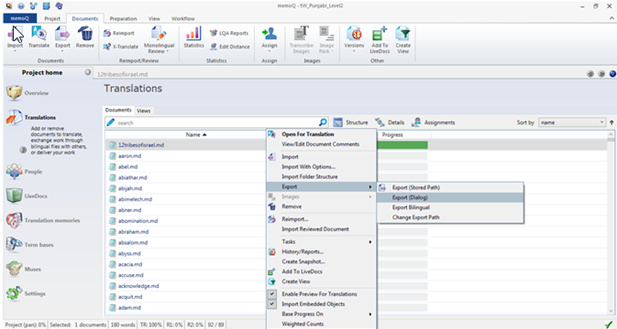
The file that you worked on shows the progress as 100%, in green. Right click on the competed file and export it in Dialogue. This file is to be saved in a different folder of your choice and it is to be replaced with the links and other information that was removed prior to importing it to memoQ in the final checked and approved stage.

STAGE 3. Checking Process
-
The checking process involves the translated files to be quality checked
-
Checking the quantity of work
-
Send the content for community check and further levels of the checking process until approved.
-
Extract the final out and send the files to the Software team for adding Links and other omitted information
STAGE 4. Work Involving Software Team
-
On receiving the final work, the software team will run the python script “placelinks.py” on the file to re-instate the links and information that was removed, prior giving it to translation team.
-
The final product before uploading should be sent by the Software team for suggestions and help if needed.
-
The issues related to formatting needs to be addressed here
-
The file extension should be in Markdown format and the file needs to be uploaded to door43 finally.